Thursday, December 30, 2010

DIY Cheap Tool Organization

I hope you all had a great holiday, my seven followers!  If you are not yet subscribing/following my blog, click the little "subscribe" button to the right; It will make my day!  Anyway, enough shameless plugging, and on to my current project. 

Speaking of a good holiday, My parents got me a TON of tools this year!  I am so happy to have nice tools and no longer have to deal with crappy drill bits that merely sit on top of wood and spin, or using make-shift tools in place of stuff I don't have.  I'm pretty sure those days are over, because this is my haul:


Unfortunately, my current tool storage situation is somewhat lacking:


I have been kind of afraid to fix any paint in this closet, because removing the old, probably lead-filled stuff scares me.

Clearly, cardboard boxes do not suffice.  I would put up hooks inside this closet, but it is under the stairs so the back wall is tilted at quite an angle.  So, I came up with this:


Please excuse the crudity of this photo.  My house was built in 1890, and the layout is all sorts of weird.  This is a hallway between the bathroom and the ground floor bedroom (the realty company counts that as a closet..?).  It has a cupboard on one side and some peg hooks on the other side.  Since I live in Michigan, keeping tools in the basement or garage is just like storing them in a bucket of water and waiting for them to rust.  This was my solution, since I have no idea how else to use this hallway.


And now I will show you how I did it:


Materials:
Plywood (any size, but mine is 4 feet by 28 inches, I found it in the garage.)
Paint
Drill and bits
Long nails
Large hammer
Short nails


First, you want to put your plywood on a surface that allows you to paint the whole thing easily.  My solution was this:


Now, you want to put 2 coats of paint on your plywood and let it dry. 


Once your paint is dry, put your plywood on the floor and start laying out your tools:


 Next, you want to start driving nails wherever you have holes on your tools.  Notice how some tools above are lain out diagonally, that is because when I held onto the hooks, that is the direction they hung.  Make sure to do this to see what angle your tools will hang before you begin placing nails.  As you probably noticed, I'm a fan of doing projects on my living room floor.  Partly because this is where the tv is  the biggest area in my house. How does one keep from driving nails into the floor, you may wonder?  Well this is how:

The tape marks the safe depth I can drive the nail without going through the plywood.  Hold the nail next to the edge of your plywood and determine the safe depth, and wrap the tape around that mark.  Painters tape works especially well for this.


Now that all your nails are driven, take your tools off the board and set them aside for now. Actually, you need to get your camera and take a picture of your tool layout.  This way, you can have a visual reference for your tool locations when you go to put them all back.  Then take a level, a hammer, and some really long nails over to where you want to hang this thing.  take the handle of the hammer and pound on the wall to find a stud.  You should be able to hear a more solid "thunk" about every 16 inches across the wall.  This is where you want to drive your nails.  Hold your plywood up with the level, arrange it, and drive a nail near the center, into a stud.  This will allow you to still adjust the level, which will have shifted from the pounding (or at least it did for me, since I did this myself and didn't have someone holding the plywood for me).   Once that is done, hang up your tools and admire your work.


I hope this helps you get inspired to organize in creative ways!  What have you done in your house? 

Oh, and say Hello to our new addition, Chunk:

Sunday, December 12, 2010

Miscellany

A few things:  First, my best friend and roommate for the past 2 years, Cherish, graduated from Central Michigan University today with HONORS!  She now officially has a bachelor's degree in English with a communication minor.  And yes, that is her real first name. 

Second, I finally finished a few knitting projects for Christmas presents and got them wrapped.  You don't get to see those, but you can see what I wrapped them in, which I found at Michael's for a buck a roll last summer:

Additionally, I never showed you what I did with those chairs I upholstered a few days ago:


Considering the fact that I did not even take a picture of the table with me to get the paint for the chairs, I think I got a pretty damn close color match;  Especially considering Walmart's crappy paint color selection. 

Finally, my dog is adorable:


Seriously, the rest of my living room is spotless right now.  Duke just happens to be standing next to my giant "Tub-O-Wedding" craft supplies.  I think he was looking for Max, Cherish's rat terrier, who moved back home with his mommy today.  I sort of imagine that song, "Somewhere out there," from An American Tail, playing in his head--but that's just my weird habit of anthropomorphizing my dog.  But still, that's TOTALLY what he was hearing.


Wednesday, December 1, 2010

Dining Chair Makeover w/tutorial

Whew!  I have spent the past few weeks trying to get our house into order.  I have discovered that, if you put stuff in a messy closet, it's just hiding the mess.  Same goes with drawers.  So, I have been organizing closets and drawers, while the rest of my visible living space continues to look like crap.  I'm slowly chipping away, though.  One room on our house that constantly makes my skin crawl is our dining room.  It is full of antiques that I've inherited the past few years, and I really wanted to add something modern to add a little contrast and classic modernity to the victorian furniture.  We have a couple of dining chairs that we got at Goodwill for 4 dollars apiece.  they looked really cool, but they are the "assemble yourself" type, and they constantly need tightening.  See exhibits A and B:


not so bad from a distance...


But then you see these, ugh!
With a little cash and a trip to JoAnne's, I was able to turn them into this in about 24 hours:


Here's how I did it:
 
Materials:
Staple Gun and lots of staples
1.5 yards of upholstery material (in home decor)
2 foam chair pads
cotton batting
elmer's glue
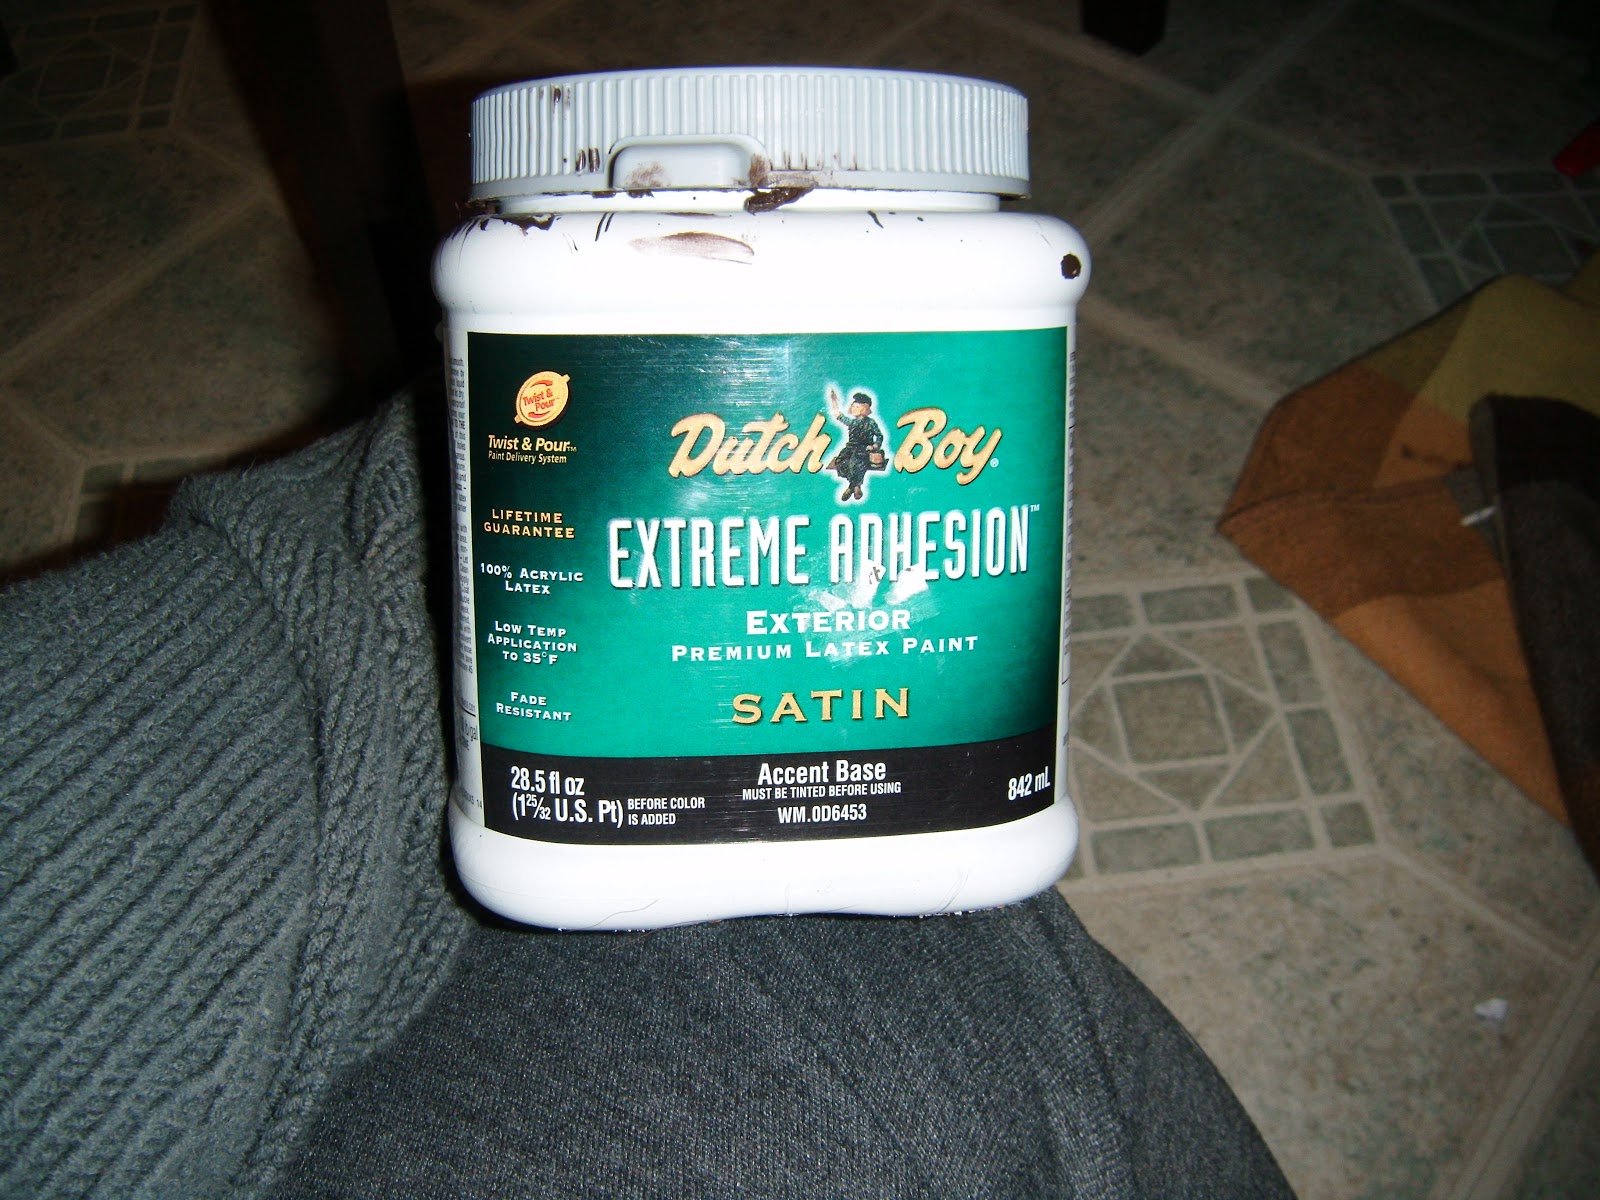
satin finish paint in brand/color of choice (one quart)
one inch paintbrush
Spackling or wood filler
sandpaper
set of allen wrenches
Damp washcloth\
drop cloth and paint clothes

First, I removed the seats from the chairs.  Since I am upholstering them, I don't need to paint them.

There are two screw holes in front and two holes in back that attach to the seat.  Save your screws or make sure you have some new ones the same size and length! 

A step you want to take here if the chair is not already reupholstered is to take your power drill and drill out the screw holes a bit deeper.  Don't drill the actual small hole the screw goes in, but drill the larger hole that the screwdriver goes in.  Shave off about 1/4 inch of wood from this part, because the added thickness of the fabric will prevent the screws from gripping deep enough to hold the seat on the frame.  This took me sooooo long to figure out when the seat wouldn't go back on, so just do it now and get it over with, instead of wrestling with tacky chairs and trying to drill them without leaving marks anywhere! 

Now you want to take your allen wrenches and find all the allen-wrench screws in your chair.  One by one, remove a screw, put glue on the loosened joint, and put a line of glue along the length of the screw.  This will ensure that it will not loosen over time.  They make products for this purpose, but I had glue so that is what I used.  I'll let you know if it gives me problems, but I don't anticipate any.

Make sure the glue gets down into the joints like this.

If necessary, clamp any joints that won't stay together until they are dry.  Next, take spackle and fill those ugly giant holes in the screws (where the allen wrench goes) and any scratches or dents in the chair. Then go over the whole chair (minus the seat) with sandpaper.  Any sandpaper will do, this is just to ensure that the paint sticks better.
After you have sanded the chair, wipe it down with a damp washcloth so you can pick up the loose dust.  Be sure to let the chair dry after this.  Once it is dry, you are ready to add the first coat of paint.  It will be streaky, but don't worry about it too much at this point.  The paint I used is exterior paint because it is more durable and it was on clearance for 5 bucks. 


 Since I was using exterior paint and it is too cold to paint outside (paint does not dry well in cold), I painted in my mud room and took some precautions because of the paint fumes.  I opened 2 windows to get a cross breeze, and I used a space heater on the other side of the room (which is more like a hallway than a room):


This is how my chair looked after the first coat of paint:
Chairs have a lot more crevices to paint than you think. This is why I used a one-inch brush instead of something larger.  Be sure to paint the bottom of the various parts as well, because they will be noticeable if you don't.  The top you see that is not painted is where the seat attaches, so I wanted to keep that unpainted.

Now you want to let your chair dry overnight, so now it's time to get out your fabric and seats, staplegun, batting, foam pads, glue, etc.  You will also want some tools that resemble these:

The pliers are so you can pull out dud staples.  You will NEED them, trust me!

First, make sure your foam fits on the seat.  It should come almost flush to the edge.  Since the back of my seats had an extra "notch" of surface area, I had to buy a third seat cushion and cut a piece to fit at the back.  I glued them in place with a little bit of Elmer's glue.  I made sure to glue the separate sections of foam to each other as well, so they don't split apart under the upholstery.

Now, lay the whole seat and foam on top of your batting.  cut the batting so that you have about 1 inch (or more)of overhang on each side.  You want to glue this batting to the top of the foam.  If you have spray adhesive, use that.  I didn't, so I just ran a small bead of elmer's glue around the edge of the foam.  In my case, I left 3 inches of overhang because I'd rather trim off excess than screw it all up and have to start over.

Now you need to cut your upholstery fabric.  A good way to do this is to lay your seat on the fabric, batting/padding-side-down.  Fold up the edge of the fabric onto the hard seat until you have a good 2+ inches on there.  That is how much room you should have on all sides.  Since I don't measure things, I can't tell you exactly how much, but it looked like I cut about 4 inches extra all around the seat.  Keep in mind the angle of the pattern in relation to the shape of the seat.  Make sure they line up for the most part.


Now, you need to line up all your layers with the upholstery fabric on top of everything.  Now, flip it all upside down and you can start stapling.  You should keep in mind the points at which the seat attaches to the chair, and either mark them or just remember not to put a staple directly on that spot.   Make sure to pull the fabric very tightly.  Below is a progression of staple placement, and you should do something similar to this:


Ahh, the dreaded corners:  Do not try to "wing it" like I did.  It takes so much longer if you do not know what you're doing.  I thought, "I know how to stretch canvas, what's the difference?"  Well, apparently, a lot.  The fabric is thicker and the batting gets in the way sometimes, so you cannot just fold the corners so easily. 

I'm going to attempt to explan the "correct" way to do corners, which seems very wrong when you do it, but I did some research and it is the best way.  First, you take the fabric that folds directly over the "point" of the corner.  Pull it tightly over the corner and staple it in place.  Now you have a crude trianglular shape.  Go to each side of the triangular shape and pull and staple until you have a smooth corner.  Do NOT fold the corners over like you are stretching canvas.  It does not work well! 

This is how your corners should look.

Once you have finished all your corners and used up thousands of staples, stop for a moment and admire your work:

Now, back to those chairs.  Slap on that second coat of paint and let-em dry.
The paint is wet in this photo, I actually used a satin finish.

Once the paint dries, dig out the screws you saved and screw the seat back on the chair and you will have something like this:


Saturday, November 27, 2010

Circular Knitting Needle Storage Binder Tutorial

I have created many ugly storage methods for my circular knitting needles, but most of the time my storage involves shoving them on my shelf in a pile and hoping they stay there.  I was reading that some people have used tackle binders from the fishing section to store theirs.  This basically involves a binder with stronger zipper bags for the needles inside.  Well, being the cheap frugal person that I am, I decided, "I can make one of these myself instead of spending 20 bucks on a binder full of ziplock bags!"  And so I did:

Materials:
Spare binder (9" high by 3" thick) or the size of your choice)
3 sheets of matching scrapbook paper
Clear rubber stamp letters, an acrylic block, and ink
about 3 feet of ribbon (optional)
hot glue gun
large glue stick (you will need a lot!)
ziplock bags
hole punch
heavy book (optional)
Sharpie Marker

To begin, I turned my plastic baggies so that the zipper size was on the right.  I used my Crop-a-dile II to punch holes about 1 inch in on the left side of the bag (the bottom, actually, but since the zipper is on the right I'm calling it the left), if that makes sense.


Next, I labeled my bags with a sharpie, in large, black numbers. It was actually easier to punch holes in the bags after I put the needles in them, because they helped to align the front and back sides of the bag for even holes.

Next, I glued my scrapbook paper over the ugly brown cover.  First glue the back cover page like this:


Next, I folded the right side in and glued it down.  You need to coat that baby in glue stick!  A bone folder would work well in this instance, but I don't have one so I just tried to do a straight fold.  Next, I folded the corners down before I glued down the top and bottom. 
So now you should have this:

Next, you will do this with the front cover side, but when you align the scrapbook paper up with the binder, make sure the edge of the paper is at the edge of the back cover crease.  This will make for a (somewhat) cleaner book spine that people will see when this sits on your bookshelf.

Fold and glue the edges as done on the opposite side.  At this point, I was looking at the inside of the book and decided I needed to cover the ugly brown on the inside as well.  I just cut pieces of scrapbook paper to cover the inside of the covers and glued it down.  Don't ask me for measurements; I eyeball everything!


At this point you will want to set a heavy book on your front and back covers (while the binder is lying open), so that the glue can properly dry.  Once it is dry, arrange your lettering on your stamp block: 

You know what to do now:

Notice the line on the left side of the spine.  I tried (unsuccessfully) to hot glue this down better, with little success and a lot of glue burns.

I decided that the binder needed more decor, so I added a length of satin ribbon across the bottom.    Start by gluing the center of the ribbon by a small dot in the middle of the spine.  Draw a line from the outside edge back to the center with a ruler, and put glue over the line.  Holding the ribbon taut, gently lay the ribbon onto the glue and pat it down.  do NOT slide it, or you will end up wasting a section of expensive ribbon because it will get "wavy."  Rinse and repeat.   If you did it right, it should look like this:

And on the inside, it should look like this:


Now, since I made this cover with the binder lying flat (no wrinkles!), I had to set a book on it to get it to stay closed.  Let a heavy book sit on it overnight and you will wake up to beautifully organized circular knitting needles!


Tuesday, November 23, 2010

Art Degree =/= Graphic Designer

So, my two whole subscribers, if I may be so presumptuous as to assume you have been viewing my blog, you have seen my sad attempts at web design in learning how to customize the Blogger layout.  Fortunately, with the power of Google, I was able to fix it a little bit!  I am still having issues with text showing up over background images (as you can see to the right), and other minor things, as well as my perfectionism in terms of finding the perfect fonts to fit the style, etc.  Anyway, please consider this my apology for the massive amount of changes that have happened here.  Hopefully it will be over soon, and I will find something I can live with!  Please, please, provide suggestions, criticism, input, rants, praise, etc. in the comments section of this post.  I welcome criticism. 

Just sayin...

$148.00 plus cartridges


OR...


$5.89


Kitchen Shelf Makeover

So I'm currently in between jobs, since the family I worked for is moving away (*tear*), but I have decided to use this time to get the house in order, using as little money as possible.  I was lucky enough to come across these at my local dollar store for a buck-fifty each:

I bought one of them, and I liked it so much that I went back and bought five more.  Tonight, I was sitting and staring at them, trying to figure out what to do, when I remembered this ugly black shelf I had hanging in my kitchen:


I love how sturdy and functional this shelf is, but the black clashed horribly with the rest of the room and it kind of stuck out like a sore thumb.  Thus, I made this:
I drink a lot of tea (especially peppermint!), and I had boxes of it accumulating on this shelf when it was hanging in the kitchen, but it was definitely not attractive with the clashing boxes and the clutter.  Don't be fooled by the photo; the rest of my kitchen looks like crap.

Materials:
glue stick
small metal canisters or any canister of your choice
shelf
latex paint
sandpaper
computer/ printer/photoshop or paint

The label I found via Google image search is from Lovemanor's Flicker page, and you can download it Here.
Here is the original label before and after my minor editing (castellar font):

before editing

after editing
For those of you who don't feel like editing, I have included a PDF printable set of labels with flour, coffee, sugar and tea labels for your own canisters.  You can download them here.

After that, I simply printed the labels out (all on one sheet to save paper), and I carefully cut them out with scissors because I didn't feel like digging out my exacto knife it was easier. 
The next part is pretty self-explanatory:  cut it out.  glue it on the jar.  Voila.   Oh, and I painted that ugly shelf white after I lightly sanded it.  Sanding it allows the paint to stick better and gives you a more even coat.  I am impatient, so I slapped 3 coats of paint on in about 2 hours.  You should wait longer.  I'm arguing that it adds to the "shabby chic" look I was going for.

Now fill your jars and put them to use!

ignore the wax paper under the jars, I didn't want to wait for the paint to dry to get the photos.
I may go back and sand the edges so the black will show through a bit, but I struggle to get the right balance of clean lines and "shabbiness to my chic," if that makes any sense.